
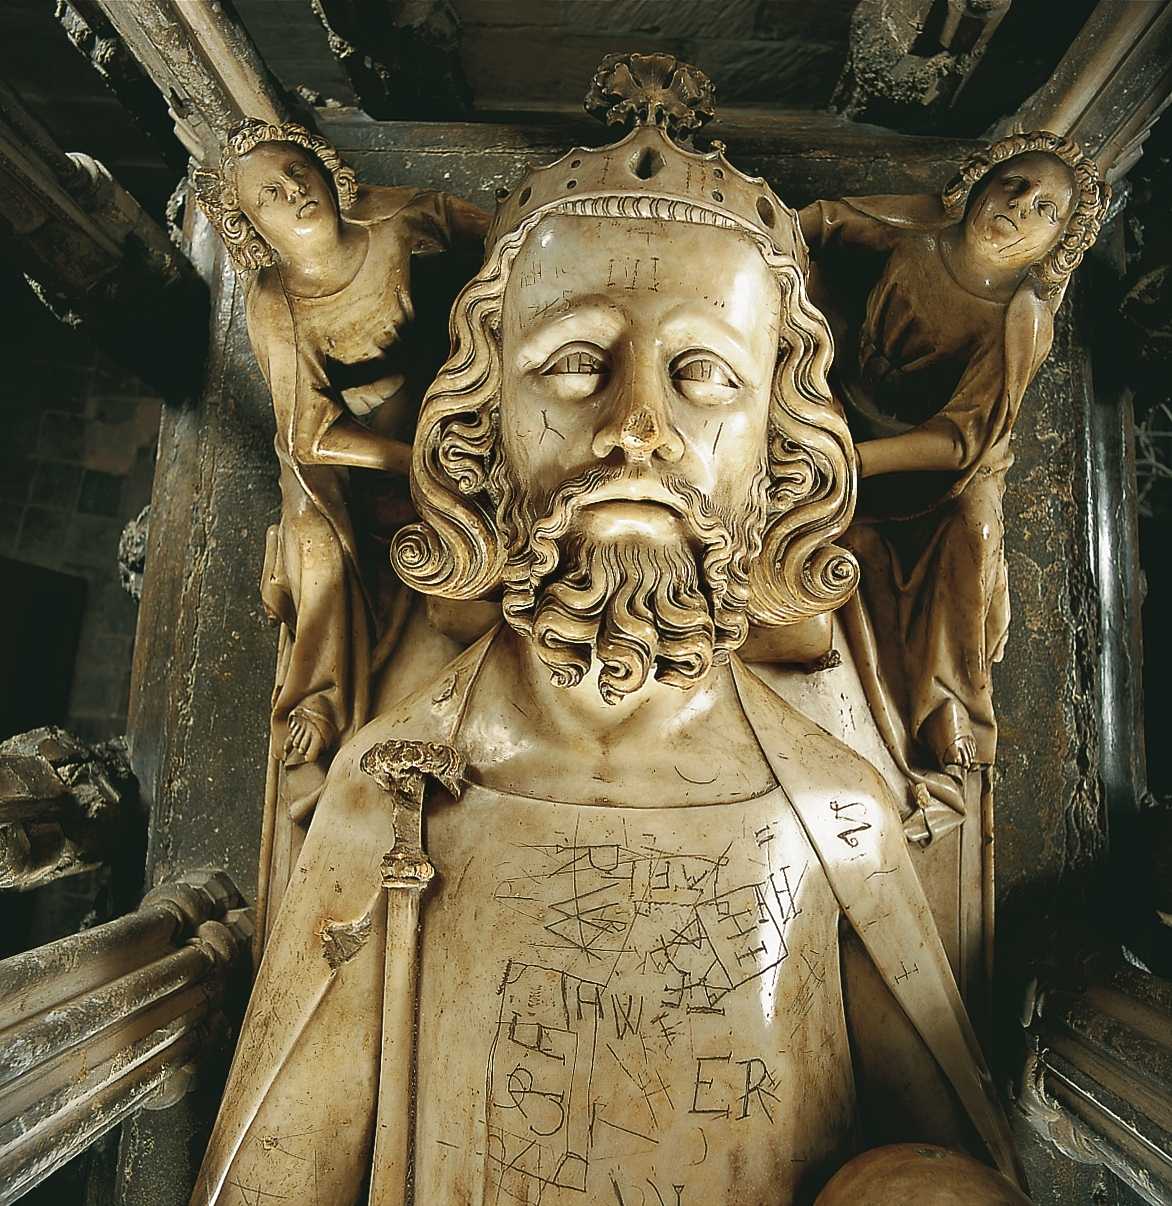
Effigy of Edward III
The Making of a Medieval Monarch
For an author seeking to portray the full scope of human tragedy, the turbulent fourteenth century is a time period ripe with possibilities. Dynastic squabbles, the Hundred Years War, severe climate change, and the widespread devastation of the Black Death made it a time of unparalleled suffering that was arguably unmatched until the coming of our own twentieth century. The warlike Edward III, self-styled “King of England and France” was a product of this unsettling period in history.
Grandson to a king of glorious memory, Edward I, the Hammer of the Scots, and son to the weak and unpopular Edward II—think of the simpering young fool from the movie Braveheart—Edward III was a man of grand ambitions. Propelled to the throne in a bloody overthrow of his father at the hands of his mother, Isabella, and her ambitious paramour, Roger Mortimer, his was to be a reign that was steeped in blood and violence. At the tender age of eighteen he cunningly infiltrated Nottingham Castle through a hidden subterranean passage, seized Mortimer, and sent him to his death by hanging at Tyburn.
His own master at last, he sought to return England to the relative position of strength it had attained under his illustrious grandfather. In doing so, he initiated wars with both Scotland and France, the latter of which would smolder on well past his death in 1377, after an astonishing fifty years on the English throne.

Tomb of Edward III in Westminster Abbey
Edward III was born at Windsor on November 13, 1312. All three of his father’s older brothers had died young and the kingdom had long dreaded a disputed succession. Earlier experience in both Scotland and France had shown such occurrences to be thoroughly destabilizing, disorderly, and bloody. The English nobility had grown increasingly on edge and, intensely uneasy at the king’s blatant promotion of his foreign favorite, Piers Gaveston, had uncharacteristically united in support of the young Gascon’s arrest and execution earlier in the year. Any further sign of instability in the royal household was therefore cause for genuine concern. So the birth of a robust male heir was met with great relief and celebration both within the court and throughout the realm.
But this time of good feelings was to be short-lived, as the hapless king’s ineffective attempts to slow the erosion of English control in the Lowlands of Scotland unraveled on the field at Bannockburn in the summer of 1314. This humiliating defeat at the hands of the Bruce provided a convenient excuse for a powerful cadre of nobles under the leadership of the earl of Lancaster to rigidly enforce a harsh reform agenda aimed at curbing royal power that had been approved by Parliament some three years earlier. Their power grab succeeded, for a time, and for several years Lancaster and his allies ruled England in all but name. But refusing to accept this blatant usurpation lying down, the young prince’s father began searching for new allies and soon found them in the ambitious Despenser family. His unorthodox relationship with Hugh Despenser the Younger raised court eyebrows and threatened to follow the pattern of his earlier fixation on Piers Gaveston. But whereas Gaveston had seemed more interested in the accumulation of prestige rather than real power, Despenser appeared to be a young man of boundless aspirations whose influence over the king was considerable.
By 1321, Lancaster could sense the danger and moved to have Despenser and his powerful father banished. Parliament agreed and the king was, once again, deprived of his closest companion and confidant. But within a matter of months, the king felt secure enough to revoke the order of exile and the Despensers returned from France. Lancaster and his friends were soon in arms and the nation held its collective breath under the looming specter of civil war. Public order quickly collapsed and the king raised an army and headed north to confront the rebels.
On March 22, 1322, the two armies met near the town of Boroughbridge in Yorkshire where the rebel forces were roundly defeated. The king and his Despenser allies were ruthless in their retaliation. Lancaster and twenty seven other powerful knights and barons were executed and their lands confiscated. Many others were sent into captivity or exile. One such captive was Sir Roger Mortimer of Wigmore, who having surrendered to the king some two months before the battle, learned that he too had been placed under a sentence of death. Making a daring escape from the Tower of London, he fled to France where he joined a growing number of English exiles who had gathered to consider their options.
The future Edward III performing homage before the French throne
Queen Isabella, Edward III’s mother and sister to the king of France, was now becoming increasingly wary of the influence the Despensers exercised over her husband. Their complete disdain for her was well known and they had been instrumental in having her officially declared an enemy alien, subject to forfeiture of all her English estates. In 1325 she was dispatched to the French court on a diplomatic mission relating to English possessions in Aquitaine. Once under the protection of her brother, she decided not to return. She was soon joining in the counsels of the disgruntled exiles and became intimately involved with the charismatic Mortimer.
As relations between England and France continued to deteriorate over the coming months, a novel solution was suggested to ease the tensions. The crux of the disagreement between the two kingdoms lay in the English king’s reticence to pay homage to the French crown for his lands in France. Then why not send the young prince in his stead? Accordingly, Edward, now twelve, was sent to perform his father’s duty before the French court. Having declared his homage, he was pronounced duke of Aquitaine, count of Ponthieu, and count of Montreuil. But the English king had made a serious miscalculation. Rather than return to England as his father expected, the prince remained with his mother, who was now increasingly public in her criticisms of her husband.
The younger Edward now became the object of an intense tug-of-war between his feuding parents. The stakes of such a contest were exceptionally high. Anxious to cement powerful allies in what was sure to become open hostilities with France, Edward II had been actively negotiating with the Spanish courts in both Castile and Aragon for a contract of marriage for his young son. But Isabella, seeking allies of her own, used her time in France to betroth the prince to the daughter of the powerful count of Hainault. It was well understood that the prospects for a future wedding depended entirely on Isabella’s ability to deliver England from the control of the Despensers and to ensure her son’s place on the English throne. There is no indication that the prince resisted such an alliance and so, for better or worse, he was now aligned irrevocably with his rebellious mother against his inept father.
With Hainault’s support, in the fall of the following year, Isabella, Mortimer, and the young prince landed on the Suffolk shore with some 1,500 of the count’s troops. What they found was a discontented populace and a ruling class that had grown increasingly disgusted with the seemingly insatiable and grasping Despensers. In spite of the king’s call to arms, a surprising number of the nobles flocked to the queen’s cause. They were, no doubt, encouraged by the participation of the uncontested heir to the English throne.

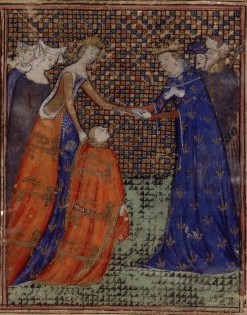
Isabella and Mortimer at Hereford
The citizens of London rose in rebellion and the king and the Despensers fled the capital. In hot pursuit, the queen’s party, gaining adherents as it went, caught up to the elder Despenser at Bristol. After a token resistance, the castle in which he had shut himself up was taken and he was summarily condemned, hanged, drawn, and quartered. The rebels now paused to take stock. They gathered in the presence of the queen and her young son to make plans for the temporary administration of royal authority. The king, they argued, through his precipitous flight, had failed to make adequate provision for the governance of the kingdom. It was decided to invest the prince with the powers of keeper of the realm. They insisted, at least publicly, that their grievances lay with the king’s wicked ministers and not with the king himself.
The party then moved to Hereford, where a shadow government was established and an active correspondence maintained with the city authorities in London. Recognizing his desperate position, the king sent representatives to seek a reconciliation with his wife. It was refused.
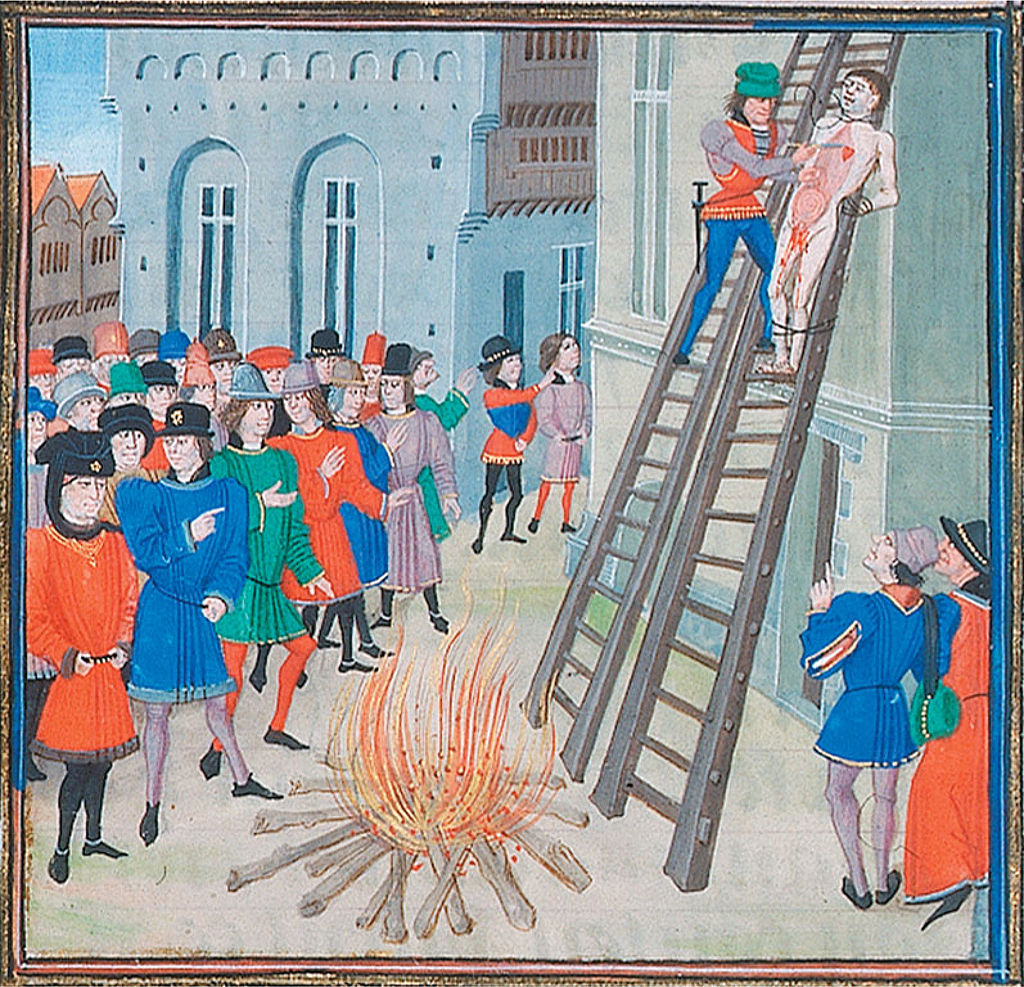
Hugh Despenser the Younger’s Execution
Having received information on the probable whereabouts of her husband, Isabella dispatched a force to south Wales where his party was betrayed and overtaken at Llantrisant. The king was detained in Monmouth Castle, while his confederates were sent immediately to the queen at Hereford. They were summarily condemned and executed, the younger Despenser receiving especial attention. His castration was the first of several agonizing tortures, preliminary to his ultimate beheading.
Now that the king had officially re-entered the kingdom, albeit under duress, it was decided that it was no longer legally possible for the prince to function as keeper of the realm. Representatives were therefore sent to Kenilworth, where the king had been transferred under the care of the earl of Leicester, to retrieve the king’s great seal. They returned with both the seal and a written authorization allowing the queen and her son to “cause to be done under the great seal not only what [is] necessary for right and peace but also what they may do of grace.” (Ormrod, 2011)
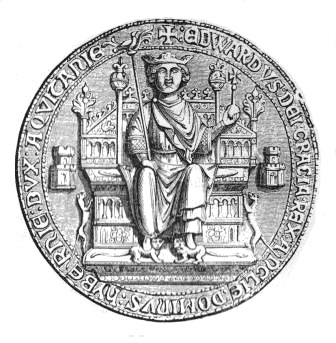
The Great Seal of Edward II
The rebellion was now passing through uncharted waters and not everyone aboard was entirely comfortable with the queen’s growing authority. There was also the question of how much influence Mortimer had over the queen’s decisions. It was therefore resolved to summon a Parliament to address these issues and writs were issued accordingly. These writs stated that, as the king was to be absent from the realm at the time of the session, the proceedings would be held in the presence of the queen and the prince. This irregularity caused some understandable anxiety among those summoned, as it was a well-established precedent that only the king had the power to summon Parliament. To assuage such fears, the prince’s advisors, who had taken custody of the great seal, issued a second set of writs under the king’s name, postponing the meeting by several weeks.
When the much-anticipated session began, there was still considerable concern over the validity of the proceedings in the king’s absence. After much debate, a delegation was sent to Kenilworth to request the king’s attendance. He refused. What little support remained to him swiftly evaporated. Spurred on by Mortimer, articles were prepared accusing the king of weakness, incompetence, poor judgment, and abandoning the realm. They called for his immediate abdication in favor of his son. The articles were delivered to the king and he was assured that if he chose to resist, another would be selected to rule in his place who was not of his line. Whether this was true or not, the king took the bait. He agreed to step aside if the Parliament would accept his son as his successor. He was fourteen.
Effigy of Edward II
Though the young Edward was now ruler in name, it was soon apparent where the real power of the crown lay. While king, council, and Parliament labored over matters of reconciliation, the dowager and her increasingly despised lover set about enriching themselves on a grand scale. When rumors of a plot to restore Edward II to the throne arrived from Berkeley, where the former king had been moved for safekeeping, Mortimer took matters into his own hands and ordered him killed. Tradition has it that his death was caused by a red-hot poker being thrust up his anus.
It would be nearly four years before Edward III could rid himself of the odious influence of the man who had corrupted his mother and murdered his father. He did so, as described earlier, with a daring and aplomb that would come to define him in the years that followed. Psychologists now tell us that, to a large extent, we are products of our environment. Is it any wonder then, with such a turbulent childhood, that the story of Edward III’s long and eventful reign is indelibly marked by the harmful and damaging effects of fire and sword? How could it have been otherwise?
References
Ormrod, W. M. (2011). Edward III. New Haven and London: Yale University Press.

A wonderful post!! Hard to believe some of the detaiks (skewered by a red-hot poker? Seriously??)
Indeed, I’m pretty sure that, should someone write it all up as a novel, readers would just shake their heads and go, “come on now, there’s no way this could ever happen in real life.”
Thanks for the comment, Nicholas. As discouraging as the evening news can sometimes be, we are lucky to be living in our own generation rather than theirs. It was an astonishingly violent period in history.
A very detailed and interesting post, James. As you say, this whole period was particularly violent which, perhaps, makes the poker incident seem a little more credible. I definitely agree with you about the present century being a much better time to be living!
Thanks, Millie. In reading the histories it is easy to see why life expectancies were so much lower then. Edward III ruled England for fifty years and died at age sixty-four. He was considered quite ancient by his contemporaries.
Jim
As far as I know, women fared even worse than many men regarding life expectancy. Which means that, had I lived at that time, I would have long since been gone!